I admit that this post is a bit of a dream of mine; the blending of style and botany makes me weak in the knees. The thing I love about wildflowers in particular is that they are so random and individual in their beauty. We recently mentioned the rising trend of greenery in weddings, which add a lovely organic element to a wedding space. This greenery trend correlates to the rising use of wildflowers in spreads, bouquets, and boutonnieres, a wonderful addition to a wedding, incorporating a bit of local flavor to the celebration.
One of the great things about using wildflowers, especially for something as small as a set of boutonnieres, is that you can grab a wide variety at your local flower shop or the grocery store and still have plenty to dapple into bouquets and centerpieces to make things a bit cohesive.
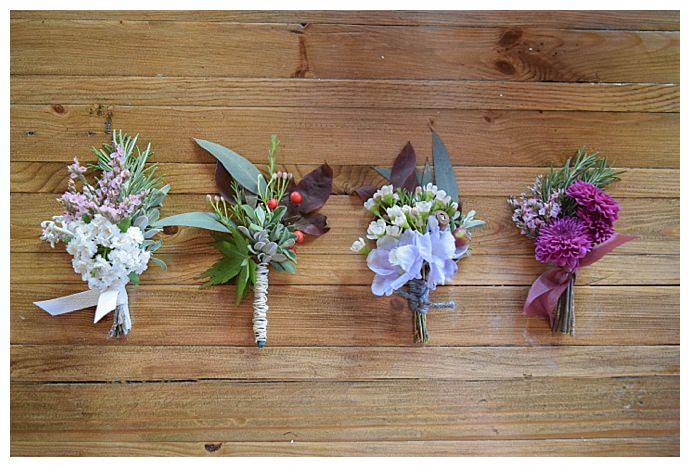
I had fun going around and gathering bunches from the markets — I even got to pick some things from my garden—but I did make sure to keep a few things in mind when I was collecting:
- Most boutonnieres need one or two main flowers, then little sprays to fill it in, so it can be easier to find the main stem(s) before you gather the rest
- Know the types of flowers and greenery you like, too — and those that would tie in with your look — before you go shopping.
- Though picking from your own garden is a sweet and wonderful idea, going around and gathering from public spaces is frowned upon, so we recommend not doing it.
- Try to stay away from using tree stems, as these have high allergy risks.
- Try and use as many hearty pieces as possible, i.e. those that will withstand heat and a little bit of fuss.
Let’s Make a Boutonniere!
What You’ll Need
- An abundance of stems to play with, big and small
- Floral wire cut in 2”–3” lengths, in the amount of boutonnieres you need
- Floral tape
- A good pair of scissors
- A finishing wrap, like twine or ribbon
- Refrigerator space (to store when you’re done)
 STEP 1
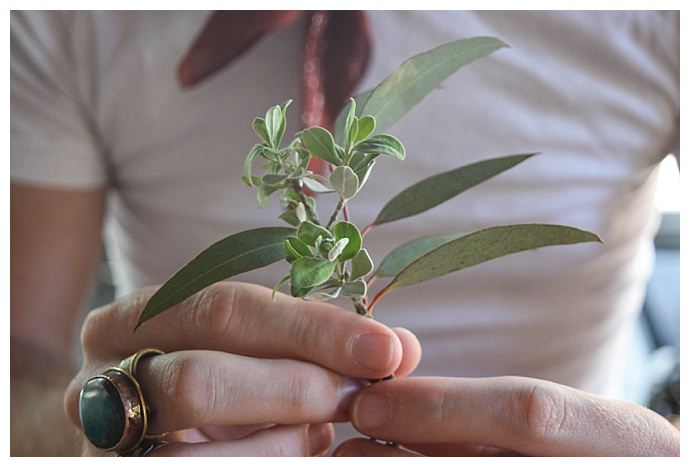
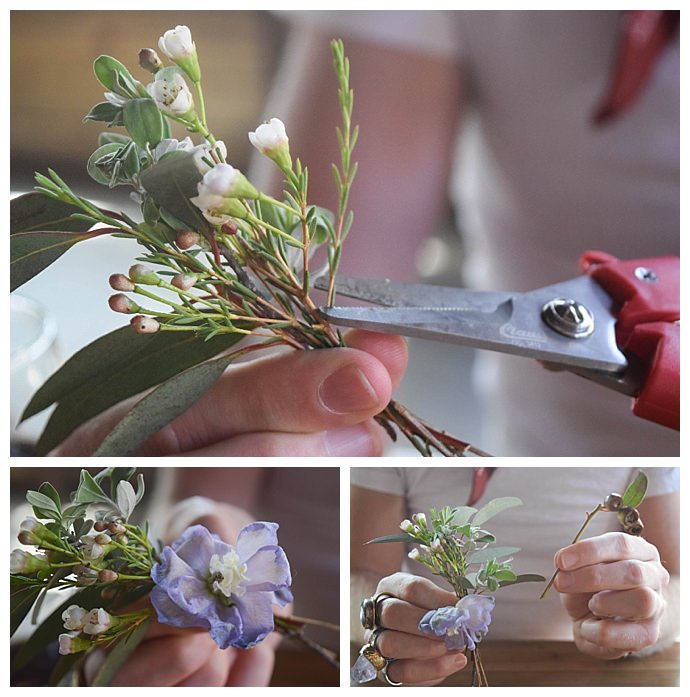
Start by taking all your different collections and snip out the very best stems, making sure to leave amply room at the bottom of the stem to secure it to the rest of the gathering. To get the right look, I simply mixed and matched to see what looked best with my base flower, also ensuring it’ll be nice and full. I’m no florist, so this part took me a little while, but it’s worth the time in the end. If you find some stems acting a bit limp, you can push a length of floral wire into the stem to make it stay upright.
STEP 2
Now, you can take the smaller stems and arrange them into neat little bundles. One by one, fill it in until the gathering is full and sturdy, then you can add the main flower(s). This is also a good time to trim any stray stems and make sure it has good visual structure (basically, just make sure that it’s not all over the place).
STEP 3
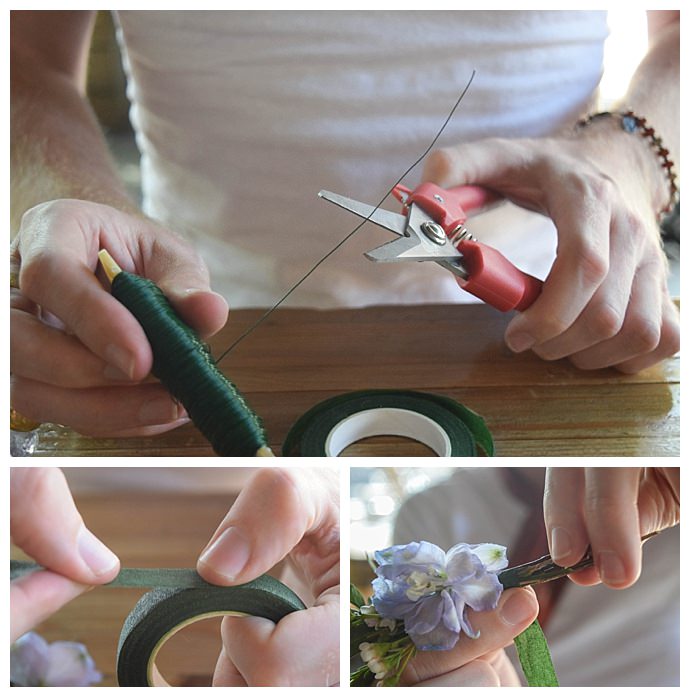
Once everything’s in place, you can get it finished out. This is where your pre-cut floral wire and tape are going to come in handy. First, wrap the wire around the stems, just below where the flowers and leaves appear—keeping it nice and tight here will help keep everything from drooping. Then, take the floral tape and wrap it over the wire and the stem bases, pulling it a little tightly to release the waxiness and help it stick.
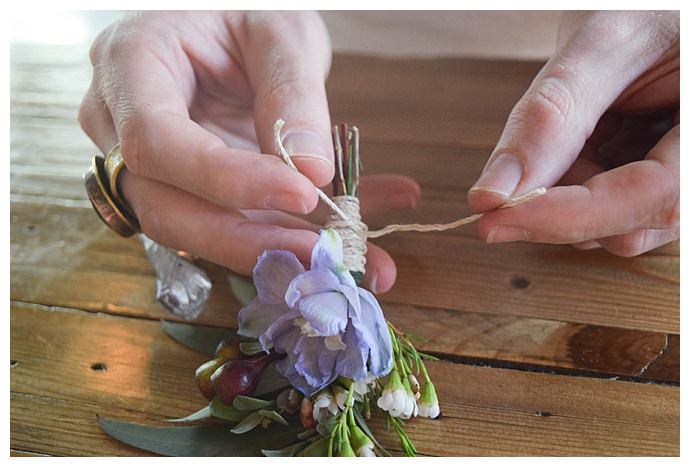
STEP 4
It’s looking pretty cute! The only thing left is to add a little bit of detail to cover up some of the messy bits. I used a delicate twine to wrap around the bottom to conceal the floral tape, but a narrow ribbon would work perfectly, too.
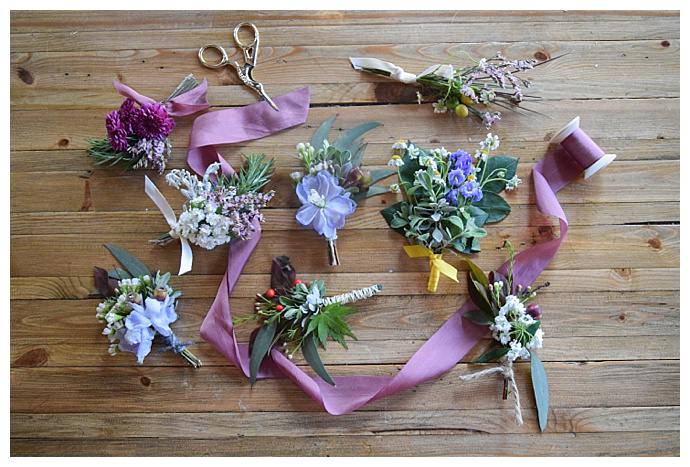
I had so much fun making these adorable little boutonnieres and hope you get inspired. I want to thank my friend Shannon of Little Wedding Extras for helping me out, taking all the photos and sharing great tips in working with floral design.
Written by:




You must be logged in to post a comment.